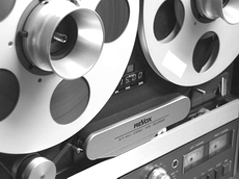
Tape recorder maintenance - Overview
Analogue tape recorders need special care and attention in order to get maximum sound quality
Wolfgang Bleier, Austria
July 2008
Professional analog tape recorders are quite complex audio equipment known for their warm and most lifelike sound reproduction. Their sound quality is influenced by a number of factors and - whether to the better or to the worse - depends on how much attention we pay to allignement and calibration. Above that, analogue tape recorders more or less degrade the recording signals by adding distortion, hiss, frequency response alterations, speed variations (wow and flutter), print-through effects, and drop-outs. But still, even a good semi-professional tape recorder is a match for the finest audio equipment available today, provided that it is properly calibrated and maintained. It is an effort to make them sound good, but once aligned and calibrated they sound really good, incredibly good.
Maintenance of an analogue recorder and a digital recorder is quite different. First of all you do a lot of basic maintenance on an analogue recorder. In contrast, you can't do much more yourself than to run a cleaning tape on a digital recorder, if you aren't a trained expert. Secondly, you have to do maintenance and regular, frequent cleaning of an analog tape recorder, otherwise its performance may considerably suffer.
Alignment and Calibration
Alignment and calibration has two functions: one is to get the best out of the machine in combination with the audio tape of your choice; the other is to make sure that a tape recorded on one recorder will play properly also on other recorders. The following parameters are aligned to specified or optimum values:
- Azimuth - the heads need to be absolutely vertical with respect to the tape otherwise there will be cancellation at HF. The other important adjustments are the head-zenith, wrap and height.
- Bias level - optimises distortion, maximum output level and noise
- Playback level
- High frequency playback EQ
- Record level
- HF record EQ
- LF playback EQ
Cleaning
Tape heads and other metallic parts that get in contact with the tape must be cleaned gently with a cotton bud and isopropyl alcohol (90%). Isopropyl alcohol has good cleaning properties and is absolutely safe and recommendable.
The pinch roller of a tape recorder is made of rubber or a rubbery plastic and shouldn't be cleaned with isopropyl alcohol. Instead, you can buy special rubber cleaner. I use a wet cloth with a very small amount of mild, liquid household cleaner. When done, I remove the remains of the cleaner on the pinch roller by using a wet cloth. Pinch rollers are made from various different materials, and in the worst case may react on aggressive cleaning agents.
The cleaning of the tape heads and other metallic parts I do after around ten tapes have passed the tape path. Do not soak the cotton bud or make the head dripping wet, it should be rather damp. Do not just distribute the contamination, but rub firmly in only one direction until the cotton no longer shows contamination being removed.
The pinch rollers I clean quite frequent, from time to time I use a special rubber cleaner. To me nothing is worse than good but filthy audio gear and I made regular cleaning outside and once in a while also inside of the recorder a routine.
Demagnetizing heads and tape path
Over the time, the magnetically charged audio tapes may leave residual magnetism in the metallic parts of the tape path that can impair the ability of subsequent tapes to record or playback accurately. A special demagnetizer, for example a Han-D-Mag made in the United States by R.B. Annis Co., which can be purchased also for European 230V voltage rating, is used to remove residual magnetism in metallic parts of the tape path.
Correct use of a demagnetizer without jumpy movements is important, otherwise the condition of the tape heads can even get worse. How frequent the tape path should be demagnetized depends on several factors, including the tape speed, recording levels, the type of tape, the composition of the tape head, and whether a recorder is used rather for recording or for playback. I demagnetize after approximately fifteen to twenty tapes have passed the heads, some say it is sufficient every six months or even longer, depending how often the tape recorder is used. In any case I demagnetize the tape path before a recording session, unless I have done it recently. Here is in detail what I think I know about Demagnetizing a Tape Recorder.
For alignment, calibration and potential repairs of my tape recorders I see Mr Anton Straka in Vienna, Austria ... he’s the uncontested expert in town!
